How to Create a Photomontage in V-Ray for SketchUp
- Jack Dicker
- May 27, 2023
- 4 min read

How to Create a Photomontage in V-Ray for SketchUp…
Have you ever wondered how to create a photomontage, completely from scratch?
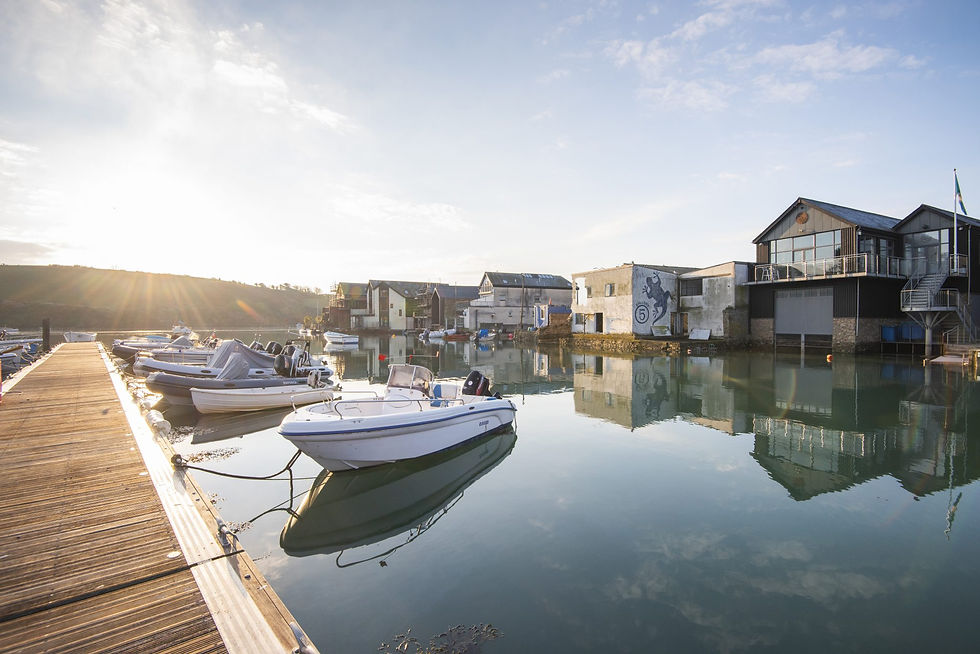
Going from this…

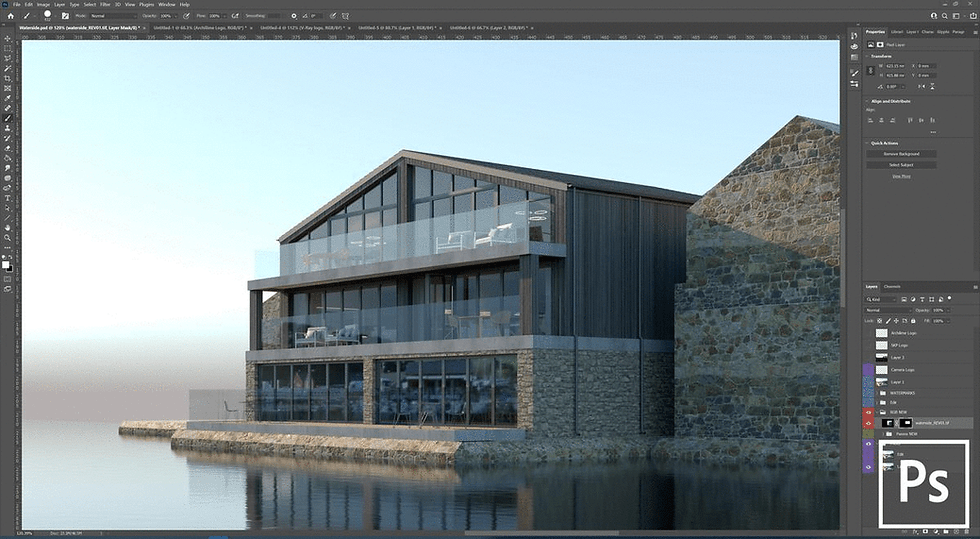
… to this

Well – we’ve got you covered. Here’s how it is done.
Firstly, what is a photomontage?
A photomontage is a mix of two different media. A computer generated image (CGI) is overlaid onto a photograph to show a new design superimposed into its existing surroundings.

Whilst traditional CGI allows us to model the surrounding environment; photomontages offer us the opportunity to view the real-life surroundings as captured through the lens of a camera, which is often required when trying to win planning permission.
What is the recipe for a successful photomontage?
In it’s purest sense, we can break down how to create a photomontage into four fundamental steps…
Step 1: The photograph.
The photograph that we are to use for the photomontage can be considered as our ‘base’. All subsequent work depends on the initial photograph that we would like to stitch our CGI onto.

As a result, we need to ensure that it ticks all of the boxes before we progress…
The industry standard for photographing Architectural forms dictates that all of the verticals must look vertical within the image – ensure that the camera is not tilted up or down!
Consider the lighting conditions, as this is something that we will aim to copy within our CGI. Clear blue skies or a flat, overcast day – the choice is completely up to you.
The resolution of the photograph is important. We want the highest quality possible – we like our photographs to be 5000 pixels along their longest edge.
In terms of the composition, we need to remember that we will be overlaying a CGI on top of our photograph, which means that we need to ensure that we leave space within the frame to do so!
To maximise the quality of our final product, ensure that we can save out our photographs in RAW format.
Step 2: The SketchUp model.

Now for the fun part… let’s get modeling using SketchUp!
We must now model the proposed design – we run over the basics of how to do this on our 'Complete Guide to V-Ray for Sketchup' course, and we cover more advanced modelling techniques on our bespoke Top-Up courses.
Once we have ourselves a detailed model, we need to roughly match the SketchUp camera angle to that of the photograph.
This is the perfect time to think ahead to our CGI and try to match the resolution to our photograph (remember to ensure that safe frame is ticked!)

A key part of this process is ensuring that we match the Field of View (FOV) – this is akin to ensuring that we make sure that we use the same lens within SketchUp that we did for the photograph in real life.
Within the metadata of our photo, it often tells us the focal length of the lens that captured the shot…

Within SKP, we then head up to View and then choose Field of View…

Here we type in our FOV value in mm, followed by enter – note how the camera within SKP changes.

The next step is to reposition the camera to match the photo. We do this by adding our photo as a watermark within the Styles panel of the tray as shown.

This image overlay acts as a guide as we adjust the camera so that our model sits perfectly within the photo! Hit ‘Add Scene’ to save this angle!

Step 3: The CGI
We now have a SketchUp model which is aligned to our photograph – let’s prepare our CGI using V-Ray…
The first step is to develop our materials within V-Ray so that they look realistic. If you are new to this, check out our blog on creating realistic textures.

Matching the lighting in the CGI to the photograph is important, so we need to ask ourselves the question…
Are we going to use the V-Ray Sun or opt for a Dome light?
Our recommendation would be to use the V-Ray sun if your photo was taken on a sunny day.
Whilst interactive rendering, we can move the position of the sun manually as shown below to match the shadows seen in the photograph.

This technique allows for a great degree of control, enabling you to truly match the lighting conditions as you see fit!
If your photograph was taken on a day with no direct sunlight – we recommend using a dome light.
Typical examples of this would be for cloudy days, photos taken at dawn, dusk or even at night.
Check out our blog on dome lights which explains how we go about adding these into our scene.

Pay attention to try and find an HDRI that matches the lighting conditions in your photograph!
Final render
Before pushing the button on the final render, ensure that we tweak our exposure to roughly match that of the photograph (we can refine this later).

For more info on how to improve the quality of your lighting within your CGIs, check out our blog on the topic here.
Step 4: Marrying the CGI with the photograph
Now that we have the raw materials, let’s bring these into our image editing software – we highly recommend Adobe Photoshop.
Overlay the CGI on top of the photograph.
Add a vector mask, and begin removing sections of the CGI which we do not need.

It is possible to use other render elements to help with this masking process – we coach artists on this topic on our tailored Top-Up courses.
At this stage, we also look to match the tones of the materials within our CGI to those seen in the photograph.
Et voila!

We hope that you have enjoyed reading about our process to create the perfect photomontage, from start to finish! That is how to Create a Photomontage in V-Ray for SketchUp.


Comments